Geo-Zones
Geo-Zone is a virtual arbitrarily limited area on a geographic map. Geo-Zones are used in satellite monitoring systems to set a virtual perimeter, when crossing the boundaries of which the user is notified.
The system allows you to build geo-zones of various types - in the form of circles or polygons, using various geographic map providers.
Interface
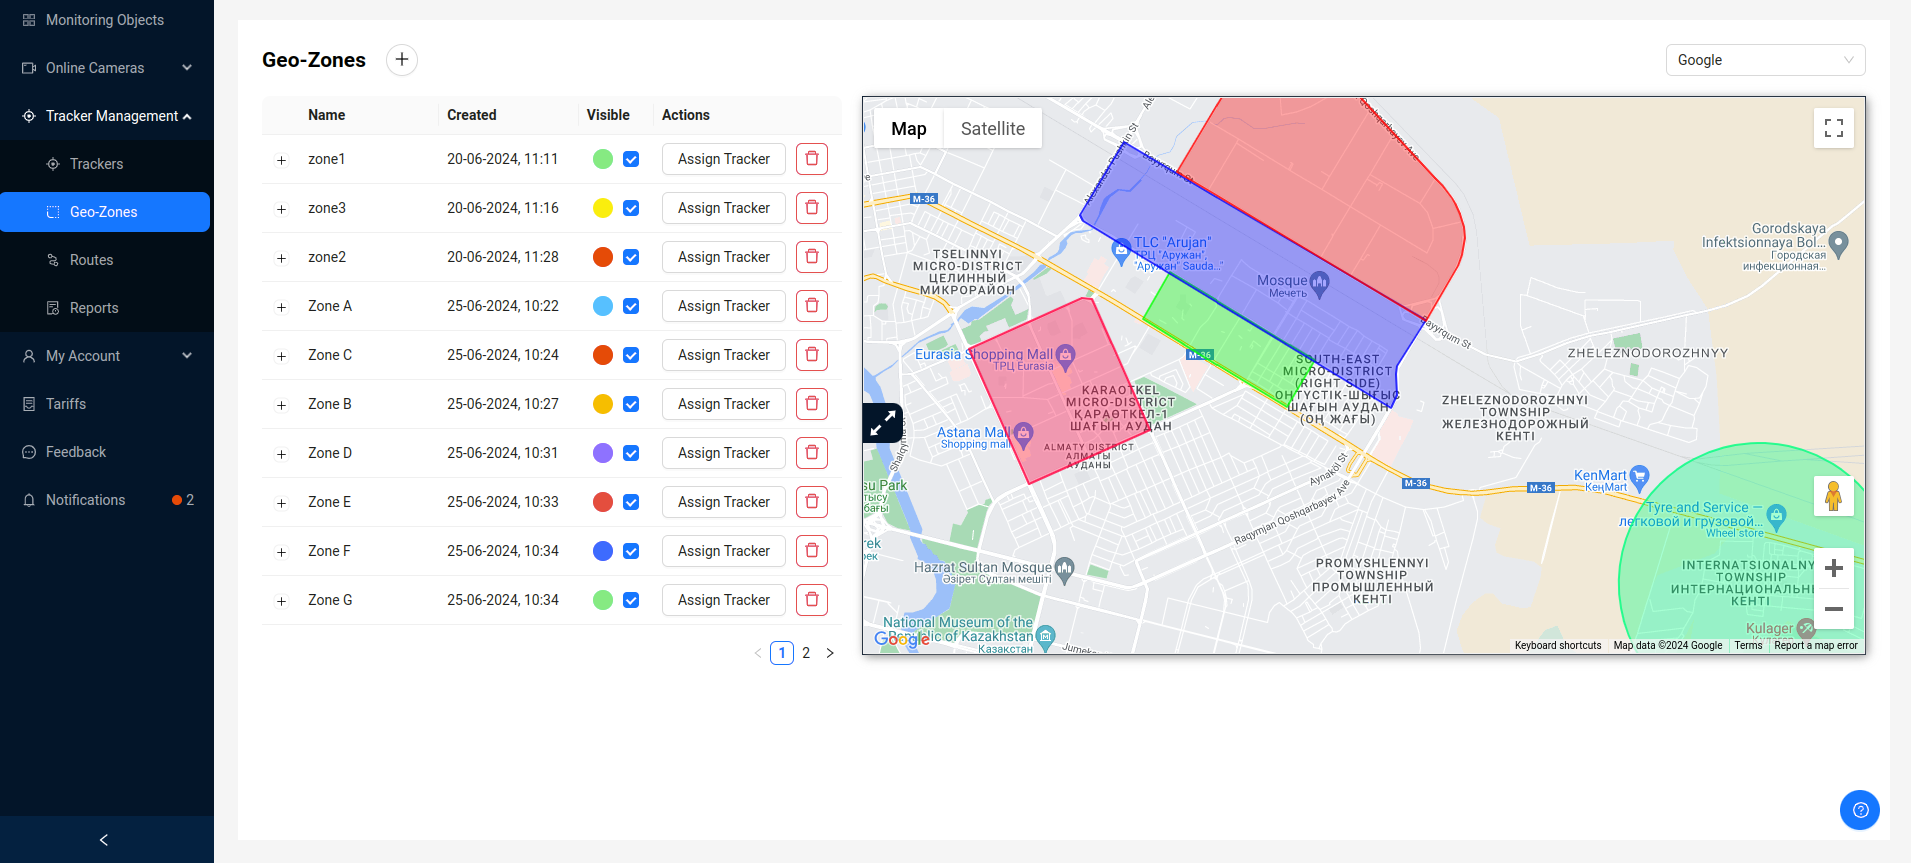
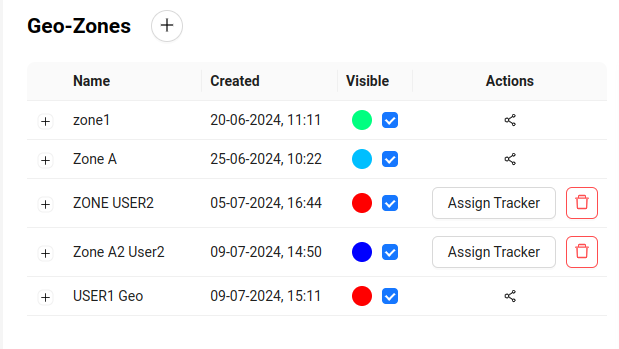
The interface of the Geo-Zones tab consists of two visually separated blocks located nearby - this is a list of user geo-zones and a map, on which geo-zones are displayed in corresponding colors.
Each row of the table contains brief information about the geo-zone - name, date and time of creation, color of the geo-zone.
Next to the geo-zone color indicator there is a checkbox that can be used to control the display of the geo-zone on the map.
When expanding the desired geo-zone line in the table, the user can view the trackers assigned to this geo-zone, which will also be displayed on the map. Each tracker has information about the system tracking its entry into or exit from a geo-zone, as well as a button for unlinking the tracker from the current geo-zone. Tracker input/output tracking is configured when binding it.
![]()
You can unassign the tracker from the geo-zone by pressing the Unassign button.
Adding a Geo-Zone
The system allows you to create geo-zones using various geographic map providers. The following providers are currently supported:
- Google maps;
- Yandex Maps;
- OpenStreetMaps.
To add a new geo-zone, on the Geo-Zones page, click on the button at the top of the page.

Next, a modal window will appear in which you need to create a geo-zone in accordance with the selected map provider.
When creating a geo-zone, regardless of the map provider, if the geo-zone type is circle, the user can change its radius in the field that appears. The geo-zone radius is specified in meters.
Adding a Geo-Zone to Google maps
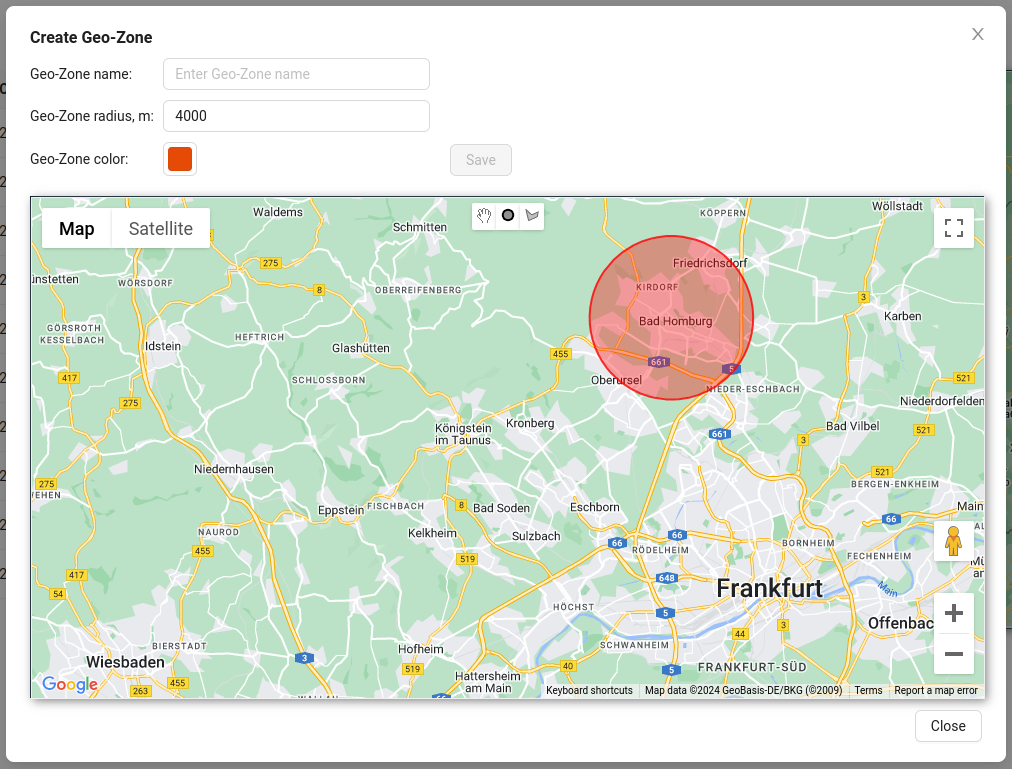
- Enter the name of the geo-zone.
- Draw a geo-zone on the map using the toolbar.

- If necessary, select the color of the geo-zone.
- Click the
Savebutton.
Adding a Geo-Zone to Yandex Maps
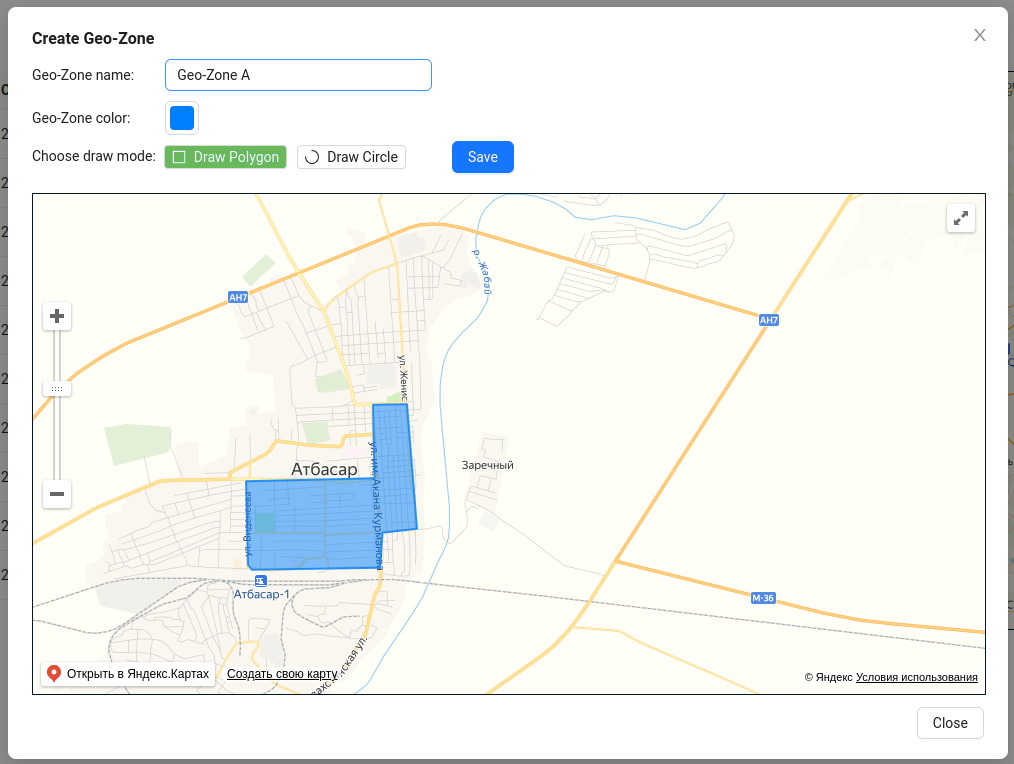
- Enter a name for the geo-zone.
- If necessary, select the color of the geozone.
- Select the drawing mode (polygon or circle) and draw the geo-zone on the map.
- If the type of geo-zone is circle, if necessary, change its radius in the field that appears.
- Press the
Savebutton.
Adding a Geo-Zone to OpenStreetMaps
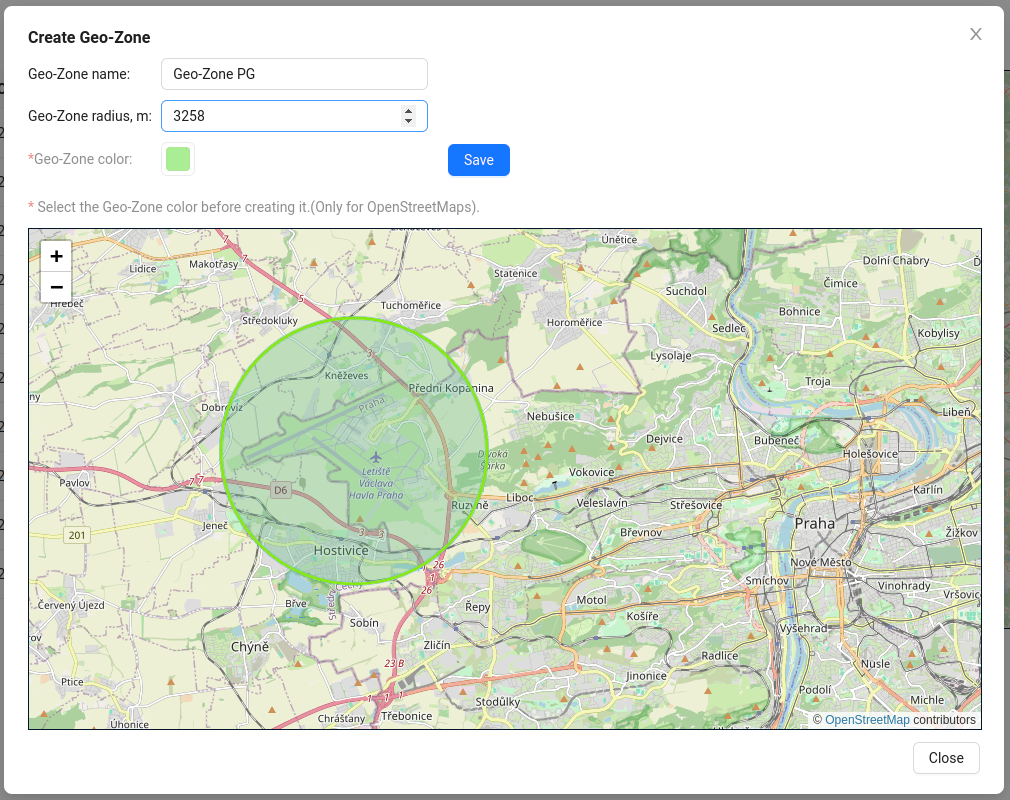
- Enter the name of the geozone.
- If necessary, select the color of the geozone.
- Draw the geo-zone on the map using the toolbar.

- If the geo-zone type is a circle, change its radius in the field that appears if necessary.
- Click the
Savebutton.
For the OnlineStreetMaps provider, it is necessary to select the color of the geo-zone before creating it. Once created, it will not be possible to do so.
Deleting a Geo-Zone
- To delete a geo-zone, click on the delete button in the table.

- Then confirm the action in the opened window.
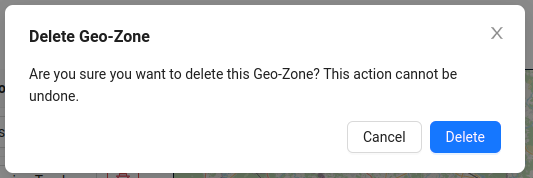
Deleting a geo-zone will delete all associated records, including tracker entry/exit information.
Assigning trackers to Geo-Zone
In order to assign a tracker to a geo-zone, you need to click Assign Tracker button in the table at the desired geo-zone.

After that the tracker binding window will open. You need to select the tracker, and also specify whether you want to track its entry into and exit from the geo-zone.
![]()
After setting all values, you need to click the Assign button.
Bound trackers will be displayed in the geozone drop-down list in the table. So depending on tracker entry/exit tracking settings, information will be available in Routes - Geo-Zones section.
Geo-Zones of other users
The system allows you to give access to the tracker to other users (share tracker). At the same time, if the tracker has geofences attached, they will also become available for viewing by other users.
Such geofences will be displayed with a corresponding icon and will not be available for deletion or management by other users (except the owner).